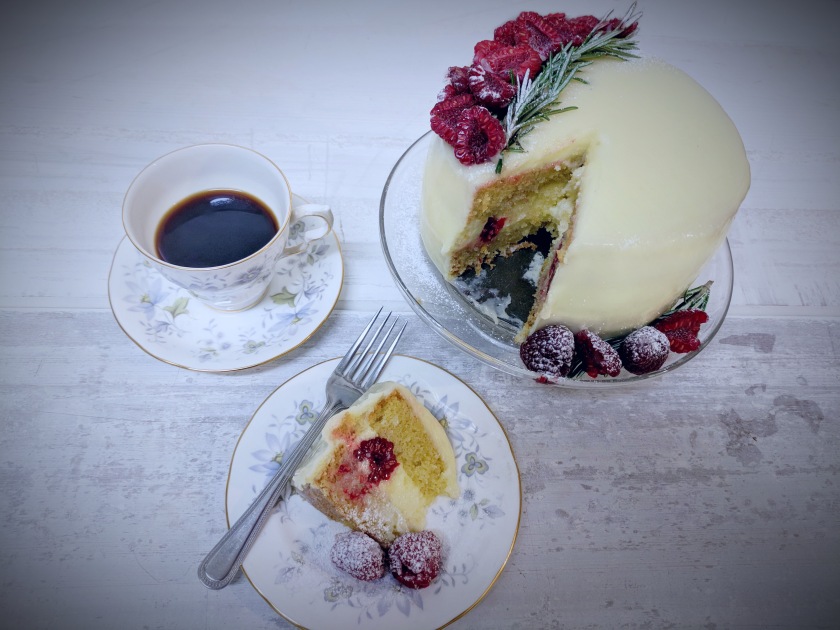
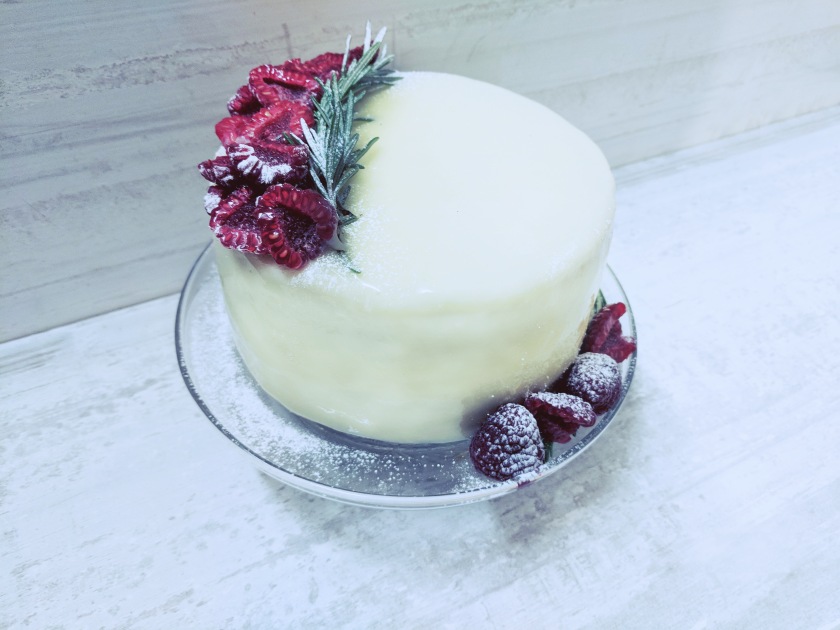
Ive been seeing a lot of mirror glazing posts on instagram lately and I thought to myself “I want to do that !” But I do have to admit I was quite scared to try this new technique, but to my surprise it was super easy ! You just need to get the consistency right and you’re good to go !
The main elements of this cake are:
- Vanilla sponge
- Vanilla buttercream
- White chocolate glaze
What I have learnt from my experience in the kitchen is that you need to be patient ( which i am still learning ) and to read the recipe thoroughly ! One step at a time is key and to never rush ! So lets get to it !
Vanilla sponge
225g Caster sugar
225g Self-raising flour
2 tsp Baking powder
225g Margarine
4 Eggs
1 tsp Vanilla paste ( any type you can get will do fine)
Vanilla sponge method
The very first thing i do before i make a cake is line my tin with baking parchment. You dooon’t want to make the cake batter and let it sit because the longer you let it sit the higher the chance something may go wrong, for example the the cake may not rise as much as it should. So to be safe ( and prepared) line your cake tin before you start.
- Weigh your dry ingredients and margarine into a mixing bowl.
- Add your eggs.
- With your paddle attachment on your mixer mix till nice and smooth, making sure you scrape down the sides.
- Once smooth pour into your 20cm round cake tin and pop into the oven at 170 degrees Celsius for about 30 minutes.
Try to avoid opening the oven before hand because the cake will sink, trust me i know ! To check if its ready just instert a clean skewer and if it comes out clean its ready ! Once its ready let it cool in the cake tin for about 5-10 minutes then you can take it out of the tin and leave it to cool on a cooling rack.
Easy right !? Let’s keep at it 🙂
Mirror glaze
19g Powdered gelatine
125ml Cold water
350g White chocolate
200g Sweetened condensed milk
300g Caster sugar
150ml Water
Mirror glaze method
- Place the powdered gelatine with 125ml of cold water in a small bowl and let it bloom and absorb the water.
- In a saucepan put the condensed milk, caster sugar and water and bring to the boil
- whilst that’s coming up to the bowl weigh out the chocolate in a bowl
- Once the mixture has boiled mix in the gelatine till it has dissolved
- Pour the mixture onto the chocolate till nice and smooth
- You can now transfer the glaze into a clean container or jug and its ready to use later.
Vanilla buttercream
320g Very soft unsalted butter
900g sifted icing sugar
100ml whole milk
1/2 tsp Vanilla paste ( or whatever you have)
2 punnets of raspberries
- Weigh out the butter , icing sugar and vanilla in a mixing bowl
- Add the milk and with your paddle attachment beat on a high speed till the butter and icing sugar are white and fluffy.
** TIP** If your free standing mixer doesn’t have a splash guard I recommend using a clean tea towel to put over the bowl area so you don’t have a mist of icing sugar all over your kitchen ! I learnt this the messy way 😀
Lets assemble this little baby !
So your cake should be cool ✅
Glaze made ✅
Buttercream white and fluffy ✅
With your sponge you are going to cut it in half so you are left with a top and bottom. Now you are going to spread some buttercream on the bottom slice of the cake and add your raspberries around the edges so you are left with a circle of raspberries !! Add a bit more butter cream in the circle of raspberries and spread nice and evenly.
Now put the top slice of the cake on top and you can start icing your cake ! Make sure you ice it nice and evenly leaving a nice layer of buttercream around it. My mistake was icing my cake with a thin layer of butter cream ( almost still naked ) then when it came to pour over the glaze you could see through the glaze. ! Ugh it was annoying ! So i stripped off the chocolate and iced it with butter cream AGAIN and glazed it AGAIN! What can i say though practice, practice and more practice! Once you’ve given it a nice smooth coating let it sit in the freezer for 5-10 minutes.
Once you’ve taken your cake out of the freezer you can put you cake on a cooling rack or on an upside down mug with a baking tray underneath to catch the excess glaze, which you can scrape up and use again! You can now put your glaze in the microwave on 10 second intervals, checking the consistency and mixing each time you put it in the microwave. I think the most i put mine in the microwave was twice. The consistency should be like runny honey ( or just a taaad thicker) before you pour the glaze on your cake give is a nice good mix with a spoon. Start to pour from the middle making your way to the edges, keep pouring till it’s completely covered. Once your happy with your coverage give it a nice good shake to get any excess glaze off and just let it sit for 5 minutes.
Now its ready to be decorated with the raspberries !!! Design it however you please ! I hope you enjoyed making this cake as much as i have !
P.s…I’ll try to have progress pictures next time i post !
Keep on baking !